Showing posts with label planB. Show all posts

Thursday, June 26, 2014

Stampy Storage Solutions

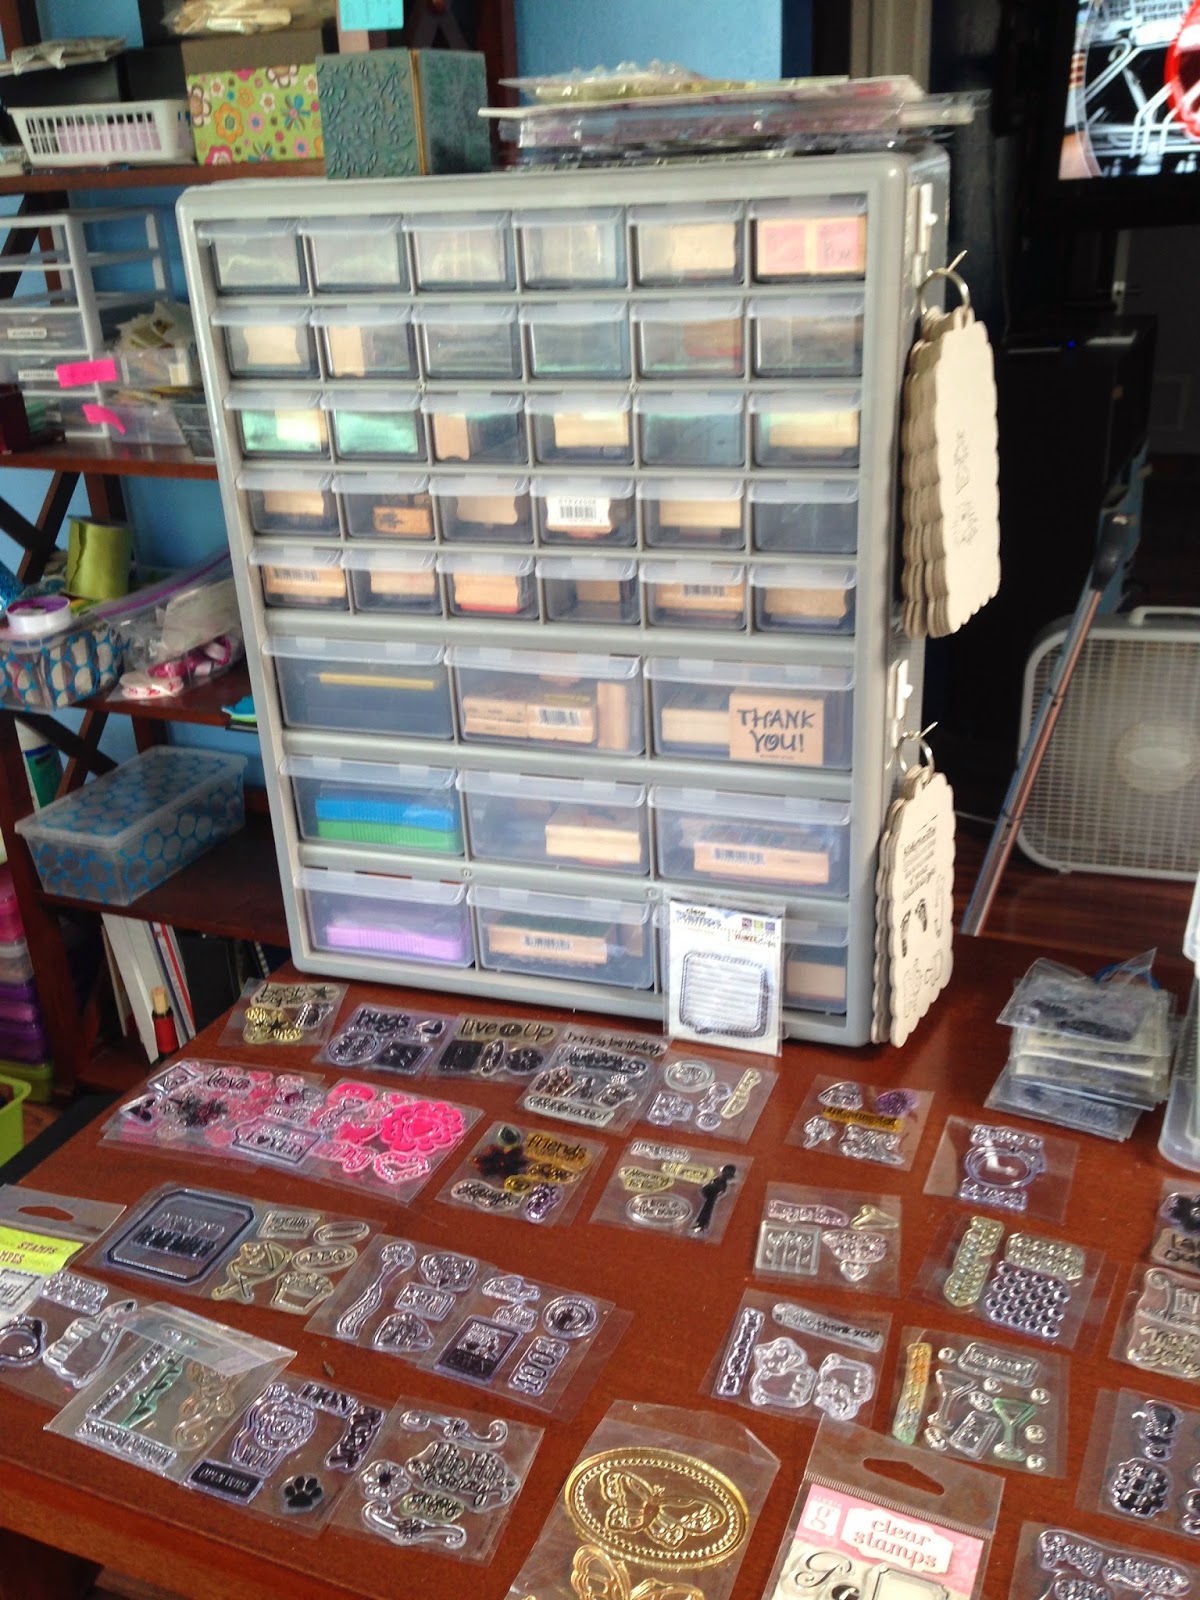
I have struggled for years to find the best way to store my stamp collection. Yes, I am old school like that and still have wooden block rubber stamps.
My collection
I could never decide or find the right bin or box to keep them in - until now!! I honestly can't remember where I saw this idea (Becky perhaps?) or in what application it was used but this little thing is my new BFF!
From Home Depot
I put some thought in to the fact that I didn't want a repeat of a previous problem - that if I can't see them I don't know what I have. So first I grouped similar stamps together to see what I was working with. Then I started dividing them in to drawers to make sure I maximized space and made sure the bigger stamps had a home. Then I did something that took forever.....ok, like 3 days but still....
Prints
I once bought out an entire Michael's bin of these chipboard albums. At ten cents each you would have done it too and you know it, so don't judge. Because I have so many of them, they were perfect. So I stamped. 
And I stamped.......
It took me several of these little albums to stamp them all but I finally got there. The images on a single page correspond to a single drawer in the little "dresser". And the cute tape? Identifies which drawer to go to!
Almost there..
So now I have these handy little flip books of images to peruse when I am looking for a stamp. And since they are grouped, deciding which "Happy Birthday" one to use is a snap! Then to make sure that the books were kept within quick reach I grabbed some Command Hooks. 

Ummm.....yes that would be the dresser full and my clear stamps waiting their turn to make reference books. You know what that means! Back to Home Depot (thanks Adam!) 
Fabulous!! I even had some of the smaller drawers still empty at the top so I added a few stickers to the front. 
Star Brads
The stickers help me remember which type of fun tidbit I have tucked in there. And finally, Adam the Amazing hung my organizers on the wall next to my book shelf. 
All Hung
Now I can find my stamps and inks quick! I love this new wall system! The rest of my craft room is under reorganization too, so who knows what else I might come up with! How do you organize your crafty corner?

Mother's Day Totes

My mom, the avid Pinterest and Facebook user, decided to "hint" at what she wanted for Mother's Day by posting the Pin on my Wall. Subtle, right? It worked. She got what she wanted, although it was a couple of weeks late because on the first try, my daughter was unhappy with the results. (Not too unhappy since she kept it for herself) So, handy (ha ha!) tote bags it was.

Dad

Mom
Part one of this process was that Adam and I had to stamp our hands on the totes. After that came the kiddo and a couple of details. Sadly I didn't get a finished picture of them, but I used yellow fabric paint to make a swirl in the center, and green to do the outline of a leaf in the corner of each.
Drying
When I mailed them I was a little nervous about the paint sticking to itself in the envelope (it's over 100 degrees here) so I made sure to fold them design out and they made it to their respective locations just fine.

Tuesday, February 11, 2014

4 in 14 February

So originally the goal was to have a different cute "pretty shelf" for every month. I am surprised by the lack of seasonal decor in my home. I went to a particular home decor / craft store in my area because it has the greatest square footage and has never let me down before. I thought for sure I would find amazing Valentine's things there to make my pretty shelf the highlight of the living room. What I found was an eight foot run of items that were of the little cute animal trinket variety. Not my style. So, I got a couple of items that I liked and ran with it. It is skimpy and not to my expectations, but here it is.

Wednesday, January 8, 2014

4 in 14 January

So I had this great idea to set goals for myself. I was going to call it "4 in 14" as in, 4 planned activities every month in 2014. So far I am off to a less than stellar start. Weekend one of each month is supposed to be seasonal decor for my home. Now, since I am new to this I was trying to start small so as not to get overwhelmed and give up. I have seen so many neat ideas on Pinterest I decided to dedicate one shelf in my living room built-in to be my makeshift "mantle" and I refer to it as my "pretty shelf".
Sadly, this past weekend I was not able to update the pretty shelf. I was hoping to have it done this week, but that doesn't look like reality either. You see, I decided it would be fun to repaint the living room, which has involved removing our outdated popcorn ceiling.
We have made great progress but this project has taken significantly longer than expected. So, today the pretty shelf looks like this:
New Grey Paint
Just so that I am not at a total loss, I should point out that I gave the pretty shelf an update for Christmas so before the paint mess it looked like this:
Dec 13 Pretty Shelf
I wish I could tell you I know where I got each of these items, but that would not be true. But since this year the Christmas tree was family themed, we busted out the "whimsy" decor. Christmas 2014 will be "Department Store". Stay tuned!!

Friday, December 27, 2013

Wreath gone wrong

I wanted to make my own wreath using ribbon I found. It was a nice wide wire rim ribbon. I see tons of them on Pinterest. I never actually read the directions.
Folding
I started by folding the ribbon back and forth in equal lengths. Then I decided I wanted a less uniform look so I started over making the lengths a little uneven. I then took floral wire and wove it through the sections.
wiring 
Since I wanted good support, I actually ran two pieces of wire through. In this photo you can see the bottom wire already woven as I am running the top wire through. My theory was that at the end I would form the two wires in to loop that met each other, thus making the wreath shape.
Flat
After I wove all the ribbon and pulled the wire tight, I realized I had grossly underestimated how much ribbon this project would take. I ended up with a flat wreath that looked nothing like a wreath at all. At this point I decided I needed a plan "B".
Hanging Loop
I decided to fluff up all the loops I had made and see what happened. I kept fluffing and reworking, again and again until I was reasonably happy with the result.
"wreath" bow
In the end I had made what my supportive family referred to as the "world's prettiest bow". I am not convinced. And I still don't have my wreath. On the bright side, I didn't use my favorite of the ribbons I bought. And I did go back and read the directions on Pinterest, so perhaps this next time I will get it right. Stay tuned.